Kubernetes 101 - pods 2

In part one of pods 101 series, we explored how to deploy and configure Kubernetes pods imperatively using a variety of commands. In this part we will explore the ability to declaratively deploy our pods using YAML manifest files. Let's get started.
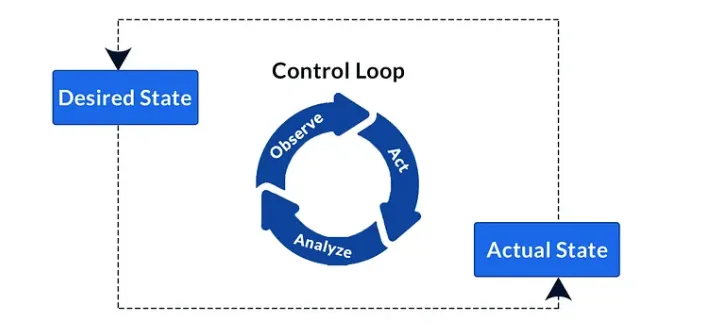
In Kubernetes, the declarative model of deployments works by first describing the desired state of an application in a YAML manifest file, posting that YAML file to the API server before Kubernetes records this as a "record of intent". Once this record is created, the Kubernetes controller (a loop that constantly watches the state of our Kubernetes cluster) notices that the observed state does not match the new desired state (created from our YAML manifest file), and makes the necessary changes to reconcile the differences.
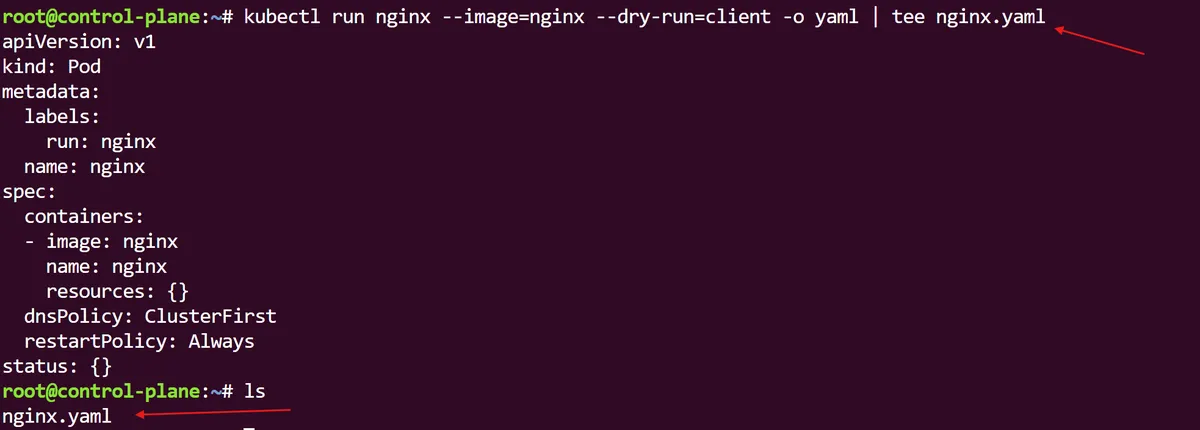
In the previous post, we used the command kubectl run nginx --image=nginx to imperatively tell the Kubernetes API to create an nginx pod. For our declarative approach, we can use this same command but instead augment it to include a dry run. This --dry-run=client flag, not only allows us to preview an object that would be sent to our cluster (without really submitting it), it also allows us to output the results of this preview creation to an nginx.yaml file:
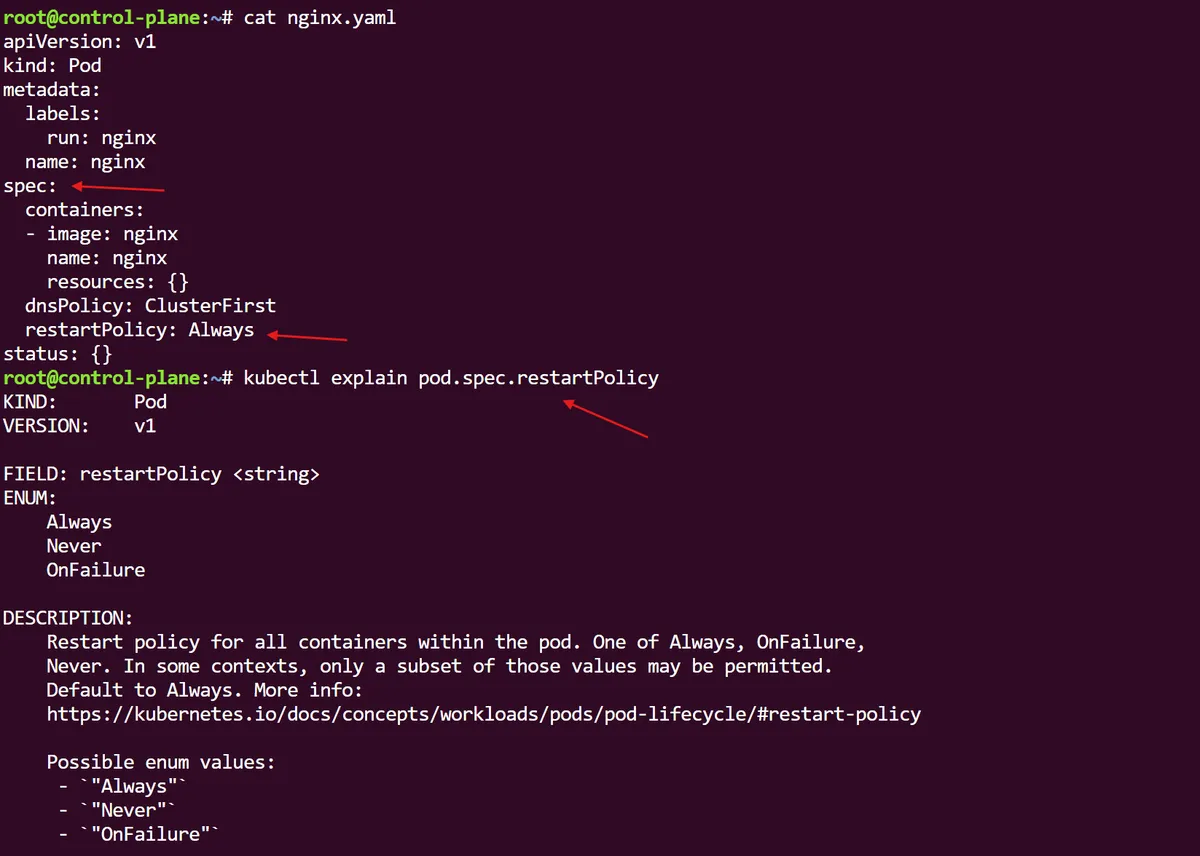
In classic Linux tooling fashion, we can simply break down the different parts of this pod spec by querying the kubectl explain command, something that is useful if you want to have a good idea of exactly what it is you are changing declaratively from this YAML pod spec:
Happy with our YAML pod spec, we can now use kubectl to create the pod from this file. Once this command is submitted, the nginx.yaml file will be sent to the Kubernetes API server for creation. Although the output tells us that the pod has been created, if we get more information on the pod we can see from the status of the pod that the container image is still being pulled and in a creating stage, until the process has completed successfully.

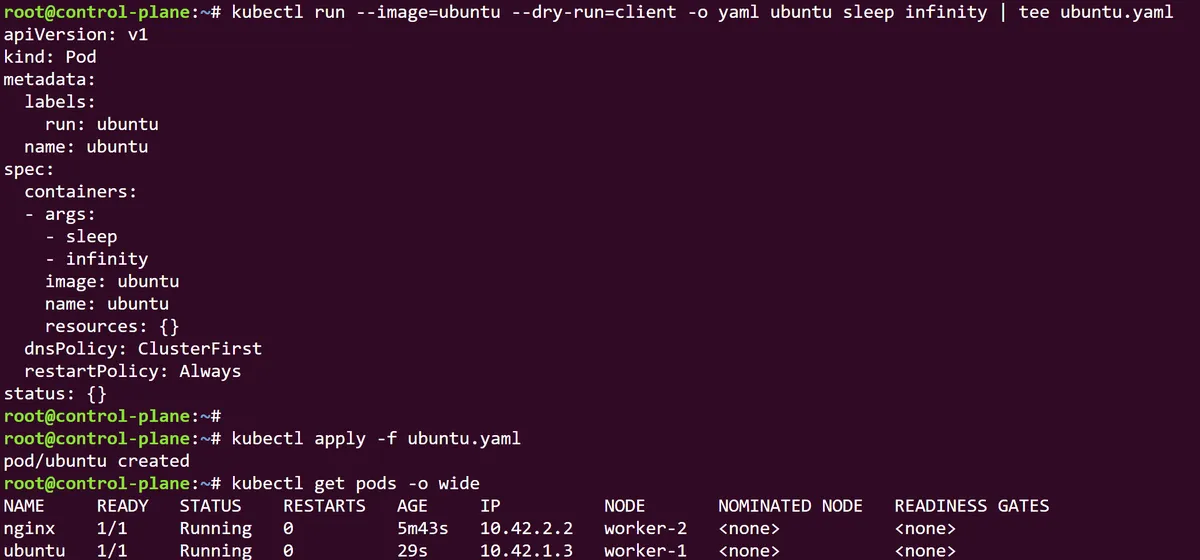
If I want to create another pod from, the ubuntu image instead, I can easily follow the same command sequence and, within a few moments, will have two separate pods that have been created using the declarative YAML approach for deployment. But what if there is a better way to manage this?
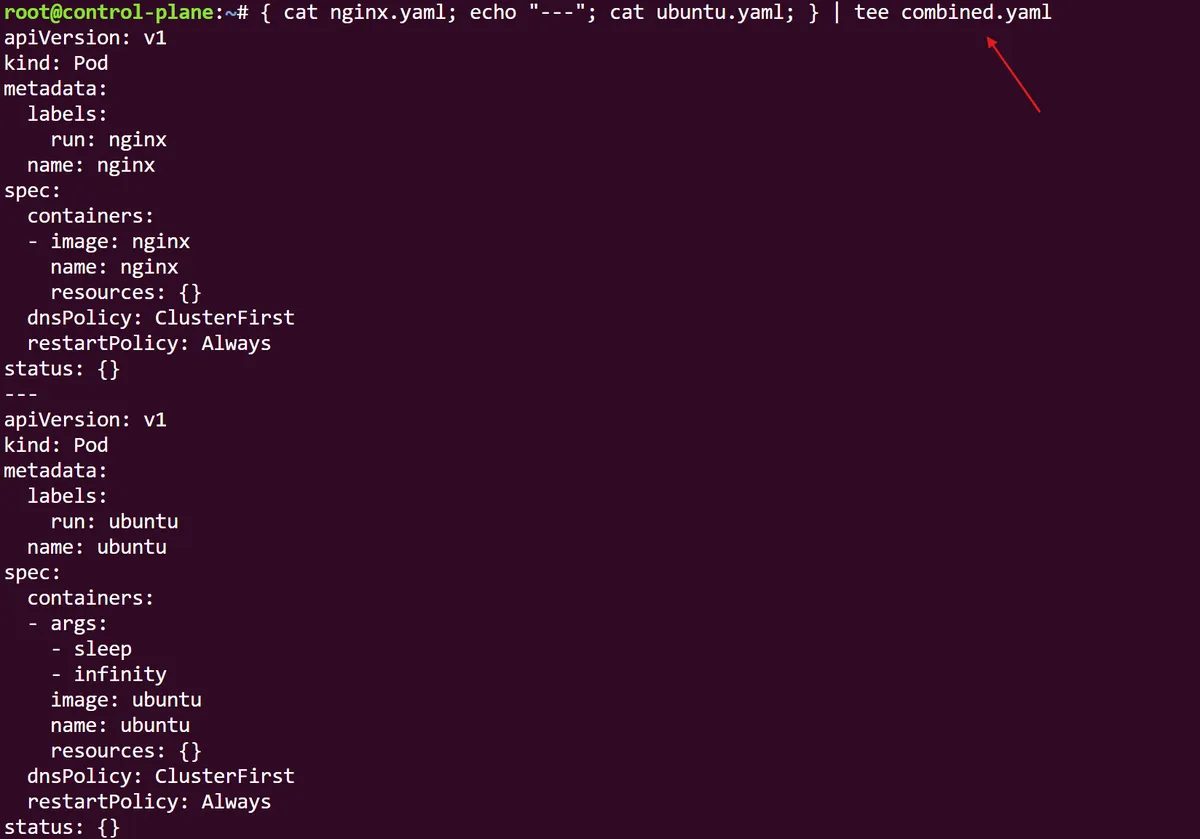
After deleting both of the pods we just created. We can take both the nginx and ubuntu manifests and (while using the special YAML triple dash separator within brackets), glue them together within a combined multi-document YAML file. This is especially useful when dealing with the deployment of multiple applications within a single stack.
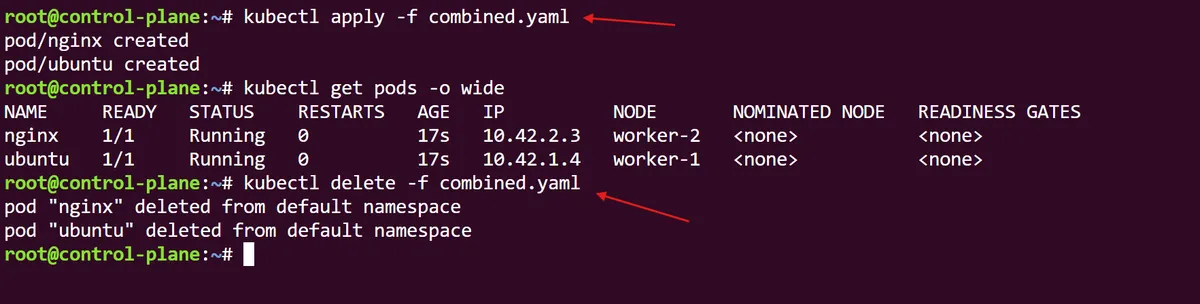
With a simple kubectl apply command we can easily create these two pods, and just as easily, we are able to delete these pods by referring to this multi-document combined file. As you can imagine, when dealing with more complex application architectures where 10-50-100 different pods are needed for a variety of tooling and operations, this ability is fundamental to making sure that we can accurately control our deployments from a single source of truth.
In this post, we explored how to deploy pods declaratively through the YAML manifest file. Manifest YAML files can be created using the Kubernetes dry-run flag on a preview deployment before being used to declaratively create a Kubernetes pod. The real magic of this comes from us using the manifest to create or delete multiple pods at the same time, as per a combined YAML spec file. Following established Cloud Native practices, the multi-container manifest allows us to have a single source of truth for all of the pods running as per our app architecture, which gives us a consistent, reproducible and auditable system of deploying Kubernetes pods at a large scale. This is the core strength of declaratively managing Kubernetes resources.
In part 3, we will expand further on declarative pod deployments by investigating how to use sidecar containers to provide a secondary service to our applications within the same pod.
thanks for reading,
Mehmet